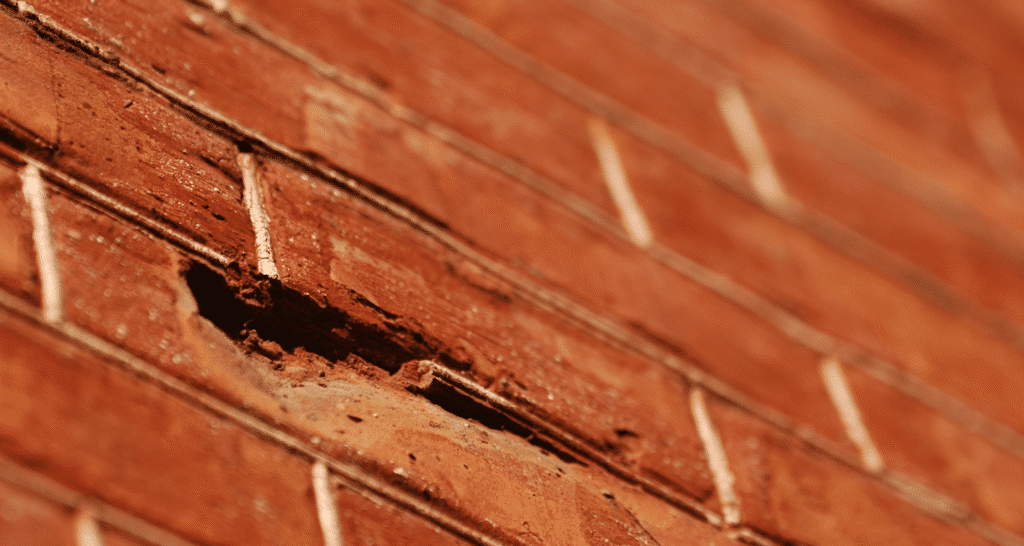
Aside from the fact that repairing a hole in a brick wall will get its appearance back, there is a greater good as well; when you fill a hole in a brick wall, you are also taking care of the structural strength of your house. Holes that damage the integrity of brick may occur due to weather, impact, and/or settling of the building. With the right materials and methods, you can make repairs that are sure to be clean, strong, and long-lasting.
Builders Group Construction leads you through the steps of patching a brick wall. Each step, from assessing damage and selecting the right tools to mixing mortar and matching texture, guarantees successful, satisfying results. Whether you are repairing exterior wall damage or mixing up touch-up paint for inside, understanding basic masonry repair can help save you time, money, and tight headaches in the future.
Brick Wall Patching Basics
Patching a brick wall reinforces it and makes it possible to repair damage to the wall. It includes cleaning debris, mixing mortar, and carefully applying it to match the existing brick. Always begin with a sound foundation that is dust-free, free of cracks and lapses where moisture can enter. Patch as soon as possible, as further damage will be much more difficult to repair and make the wall less attractive.
Tools And Materials Checklist
Make sure that you have the proper tools and materials beforehand. Top-of-the-line equipment provides for safe, easy, and accurate on-the-job use. Professionally formulated with professional-grade materials to blend well and to maintain longevity, especially for extreme outdoor weather.
- Trowel set
- Safety gloves
- Mortar mix
- Stiff brush
- Pointing tool
Inspecting the Brick Damage
Upon close examination, you can see what type of repair is needed. Shallow cracks will use less mortar, and deeper voids may require a build-out. Inspect the surrounding brick and mortar to see if they’re strong enough to hold the new patch in place without crumbling. Saturated ground is a possible hazard.
Preparing The Work Area
The work surface should be clean and firm when the mortar is added. Dust, mop, vacuum, or wipe away any loose debris and dirt with water, and be sure to let it dry. This will allow the new mortar to adhere strongly and result in a strong, durable patch for your wall. Clean surfaces matter.
- Surface cleaning
- Dust removal
- Sponge wipe
- Loose debris
- Moist prep
Mixing Mortar Correctly
Prepare mortar mix to blend with the existing color and texture of the concrete. Refer to the manufacturer’s instructions for the water ratio and mixing time. Stir with a small trowel until very smooth. Let it sit for a minute or two before applying so it gets an initial bonding strength and sets. Don’t overbeat or batter, or it won’t be easy to work with.
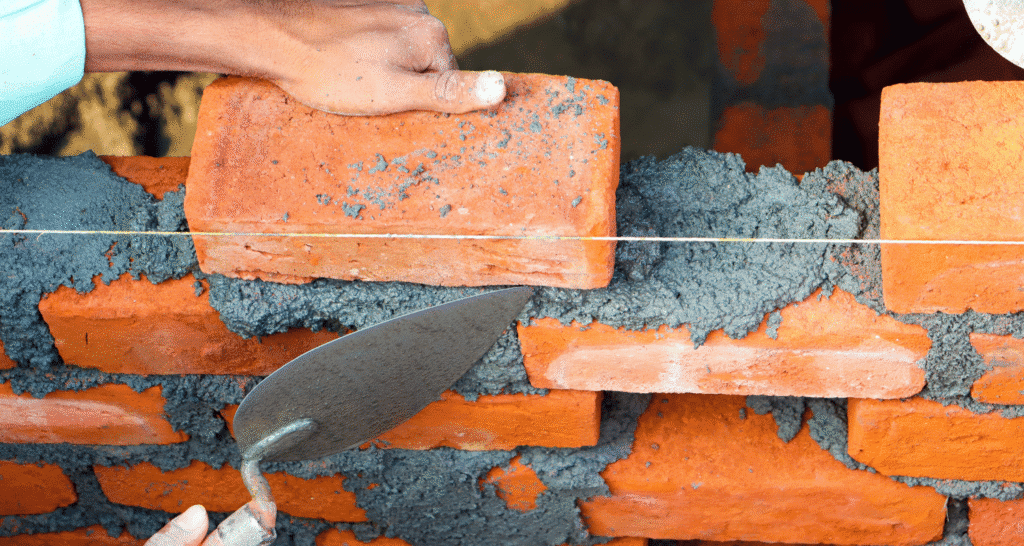
Applying The First Layer
Begin by packing mortar deeply into the cleaned hole. Start with the first base layer and spread it evenly with your trowel. For holes deeper than 8” or 10”, do it in layers, letting each layer start to firm up before adding more. This prevents later shrinkage and cracking. Good layering means the structures will remain strong for a long time.
- Trowel press
- Layer control
- Smooth base
- Firm fill
- No air
Finishing With Texture Matching
Work with the mortar while it is still fresh and use a brush, sponge, or the edge of the trowel to match the texture of the surrounding area. This repair work is much less visible and preserves the look of the wall. Allow the glaze to dry slowly for a good finish. Subtle details matter.
Fixing Exterior Wall Damage
Materials that stand up to water, temperature fluctuations, and UV rays are required for outdoor repairs. Opt for a waterproof or quick-set mortar. Once the concrete has cured, coat it with a brick sealer and water will stay out. Good caulking means your fix won’t be affected by the weather, or expansion and contraction caused by the seasons. Ensure longevity outside.
- Waterproof mix
- UV resistant
- Strong bond
- Cure fully
- Apply sealer
Curing And Drying Time
Curing is crucial. For the first 24 hours, keep the repaired area a little damp to avoid chipping. Protect from direct sunlight and wind. It may take up to 48 hours for a full cure, depending on the type of mortar and the weather conditions. Patience improves results.
Common Masonry Repair Techniques
Simple masonry restoration can really make your home look better and last longer. Encase deeper repairs with several layers of mortar. For smoother application, keep tools residue-free. With a pointing tool, mold mortar lines and force them into existing joints for a uniform appearance. Practice improves technique.
- Layer application
- Clean tools
- Pointing finish
- Mortar joints
- Texture blending
When To Call A Professional
For larger holes, structural damage, or steep walls, it’s probably best to call in the pros. Never DIY complications like repairs to internal supports or cases of significant brick movement. Hire professional contractors who can certify work against building codes and create long-term structural remedies. Safety comes first.
DIY Brick Restoration Tips
For small holes away from critical structural zones, do-it-yourself brick repair works. Use all specified Safety Gear and follow common practices for safety whenever using tools or chemical compounds. Use eye protection anytime mixing, applying, or cleaning with clean water or hazardous solvents. Be organized and take your time for a tidy, clean finish. Never rush repairs.
- Safety first
- Test colors on brick
- Stay organized
- Don’t rush
- Tidy workspace
Maintenance After Repair
While the repairs to the brick are still fresh in your mind, you can walk around your house and check how well it is holding up. Inspect the area after rains, seasons, or chill spells. Outdoor patches can be resealed every handful of years. Keep walls clean and observe any new cracks. Early intervention heads off bigger problems down the line.
Final Thoughts
Knowing how to fill a hole in a brick wall can help you repair and preserve your own home. Done with the proper tools, techniques, and safety measures, a do-it-yourself repair can look every bit as good as a professional repair—preparation, clean finish, and cured for sure.
Builders Group Construction invites homeowners to tackle small repairs with confidence and to bring in the experts when necessary. Whether rebuilding a 100 year old facade or repairing installations created last year, proper masonry repairs will safeguard the value of your property and add to it’s curb appeal for many years.
FAQs
What can I use to fill holes in brick walls?
To use for filling holes in brick walls, use mortar for larger or structural holes and masonry caulk or filler for smaller ones. For deep but not load-bearing holes, expanding foam may be effective. Always select material that is compatible with brick and for use outdoors.
How do you fill a large hole in a brick wall?
Sweep the hole clean of any loose dirt or dust. Mix up a new batch of mortar and fill the hole in layers, tamping it down firmly. Once the extender has been installed, make sure the surface is smooth, to match the rest of the brickwork, and leave it to set correctly.
How do you close a hole in a brick?
To close a hole in brick, clean the area and dampen it if necessary to improve bonding. Fill with mortar, brick fill , or patching material, depending on the size of the hole. Shape and file it so it melds with the current surface.
How big of a hole can you fill with mortar?
Mortar can generally be used to fill holes several inches wide and deep. For larger spaces, the mortar should be mixed with brick shards or backer material. Very large holes will need some of the bricks replaced or backing in concrete.