Renovating your home is exciting. It can also be stressful, expensive, and overwhelming if you don’t plan it right.
Done well, a renovation transforms how you live. Done poorly, it drains your savings and leaves you with regret. The difference almost always comes down to planning.
Most homeowners don’t realize how much prep work goes into a successful renovation. They jump in with a rough idea and a hopeful budget. Then reality hits. Costs climb. Timelines stretch. Decisions pile up. What started as a dream becomes a headache.
At Builders Group Construction, our team has 75+ years of combined experience helping Dayton area homeowners through renovations of all sizes. We’ve seen what works and what doesn’t. This guide shares everything we’ve learned about how to plan home renovations the right way.
Whether you’re updating a single bathroom or gutting your entire house, this process will help you stay on track, on budget, and sane.
Why Planning Your Renovation Matters
A lot of homeowners have a general idea of what they want. But general ideas don’t cut it when contractors start asking questions. What size tile? Which faucet finish? Where do you want the outlets? How many can lights?
Every decision affects the next one. Change your mind on flooring, and you might need to adjust your cabinet height. Move a sink, and you’re into the plumbing budget. These small shifts add up fast.
Poor planning leads to three problems:
Cost overruns. The average home remodeling costs $15 to $60 per square foot. But that range can explode when you’re making decisions on the fly. Change orders are the biggest budget killers. Something as simple as switching a door swing after framing can require a carpenter, an electrician, a plasterer, and maybe an HVAC tech.
Timeline delays. Materials have lead times. Custom cabinets can take 6 to 12 weeks. Special order tile might be backordered for months. If you haven’t locked in your selections early, you’ll be waiting while your contractor moves on to other jobs.
Decision fatigue. A whole home renovation involves hundreds of choices. Paint colors, hardware finishes, lighting fixtures, flooring types, countertop materials, appliance models. Without a system, you’ll burn out before the drywall goes up.
Good planning prevents all three. It lets you make decisions when you’re calm and focused, not when a contractor is standing in your kitchen waiting for an answer.
1: Define Your Vision and Priorities
Before you call a single contractor, get clear on what you actually want.
Start with Needs vs. Wants
Grab a notebook and make two lists. On one side, write the things you absolutely need from this renovation. On the other, write the things you’d love to have if the budget allows.
Needs might include things like:
- A second bathroom because your family is fighting over one
- A functional kitchen with enough counter space to cook
- Fixing water damage in the basement
- Updating electrical that’s no longer up to code
Wants might include:
- Heated floors in the bathroom
- A walk in pantry
- Custom built ins in the living room
- A covered patio for entertaining
This list becomes your decision filter. When you’re over budget, cut from the wants. When you’re under budget, add from the wants. Simple.
Think About How You Actually Live
Spend time watching how your household uses your home. Where does everyone gather? What rooms sit empty? Where do bottlenecks happen?
A family in Kettering we worked with thought they needed a bigger kitchen. After tracking their routines for a month, they realized the real problem was storage. We added a butler’s pantry instead of expanding the kitchen footprint and saved them $15,000.
Ask yourself:
- How do you use each room on a typical day?
- Where do things get messy or cluttered?
- What frustrates you most about your current layout?
- How do you entertain? How many people, how often?
- Do you work from home? Need dedicated office space?
Collect Visual Inspiration
Browse Pinterest, Houzz, and design magazines. Save images of spaces you love. But don’t just save pretty pictures. Pay attention to what specifically you like.
Is it the cabinet color? The layout? The natural light? The flooring pattern? The more specific you can get, the easier it is to communicate with your contractor and designer.
Consider the Future
If you plan to stay in this home for 20 years, think about aging in place. Wider doorways, a main floor bedroom, and curbless showers cost almost nothing extra during construction but become expensive to add later.
If you might sell in five years, focus on renovations that boost resale value. Kitchens and bathrooms typically offer the best return.
2: Set a Realistic Budget
This is where most renovations go wrong. People underestimate costs, overestimate their contingency, and end up stressed when reality doesn’t match their spreadsheet.
Understand Typical Costs
Home renovation costs vary wildly based on location, scope, and materials. But here are some rough benchmarks:
- Basic renovation: $15 to $30 per square foot
- Mid range renovation: $30 to $60 per square foot
- High end renovation: $60 to $150+ per square foot
For a 1,500 square foot home, that’s anywhere from $22,500 to $225,000 depending on what you’re doing.
Specific projects have their own ranges:
- Kitchen remodel: $26,000 to $78,000+
- Bathroom remodel: $10,000 to $40,000+
- Room addition: $25,000 to $100,000+
- Whole home renovation: $90,000 to $600,000+
Build Your Reserve Fund
Here’s advice from every experienced contractor: your contingency fund is probably too small.
The standard recommendation is 10 percent. That’s the bare minimum. For older homes, plan for 15 to 20 percent. Ohio homes built before 1970 often hide surprises behind walls, including outdated wiring, old plumbing, and structural issues you won’t catch until demo starts.
A $25,000 bathroom renovation with a $2,500 reserve sounds reasonable, but one plumbing problem or fixture change can wipe that out before tile installation even begins.
Allocate Budget Wisely
Don’t spend your entire budget on finishes while ignoring the things that actually make your home comfortable.
Prioritize structure and mechanicals first. Insulation, windows, HVAC, electrical, and plumbing are the backbone of your home. These systems affect comfort, safety, energy use, and long term maintenance. Once drywall goes up, upgrading them becomes difficult and expensive.
Save on finishes you can upgrade later. Countertops, fixtures, lighting, and hardware can be replaced down the road without major work. If your budget is tight, choose basics now and upgrade when you have more room financially.
Spend where it impacts your daily life. If you cook every night, invest in the kitchen. If long showers are your thing, put more into the bathroom. If the dining room barely gets used, keep it simple.
Financing Options
Cash works well for smaller projects. For larger renovations, consider these options:
- Home equity line of credit (HELOC): Uses your home’s equity as collateral and usually comes with lower interest rates than personal loans.
- Home improvement loan: Unsecured loans up to $50,000 to $100,000. Faster to close but higher interest rates.
- Cash out refinance: Replaces your mortgage with a larger one and gives you the difference in cash.
Talk to a financial advisor about what makes sense for your situation.
3: Create Your Renovation Timeline
A renovation timeline keeps everyone accountable and helps you plan around disruptions to your daily life.
Understand the Phases
Most renovations follow a predictable sequence. You can’t install cabinets until the walls are up. You can’t put up walls until the wiring is done. Here’s the typical order:
Planning and design (4 to 12 weeks): Budget creation, design work, contractor selection, permit applications, and material selection. This phase takes longer than most people expect.
Demolition (1 to 2 weeks): Tearing out the old to make room for the new. Can range from removing a few walls to a complete gut.
Framing and structural work (1 to 4 weeks): Building new walls, adding structural support, framing for windows and doors.
Mechanicals (2 to 4 weeks): HVAC, electrical, and plumbing while the walls are open. This is when everything behind the walls gets installed or updated.
Insulation and drywall (1 to 3 weeks): Installing insulation, hanging drywall, then taping, mudding, and sanding.
Finishes (2 to 6 weeks): Paint, flooring, cabinets, countertops, fixtures, and trim. This phase has the most visible progress.
Final touches (1 to 2 weeks): Hardware, accessories, punch list items, and cleaning.
Factor in Lead Times
Many renovation delays come from material lead times. Items don’t arrive instantly, and some require weeks of manufacturing or shipping. Common timelines include:
- Stock cabinets: 2 to 4 weeks
- Custom cabinets: 8 to 16 weeks
- Special order tile: 2 to 8 weeks
- Custom windows: 4 to 12 weeks
- Countertops: 2 to 4 weeks after template
- Appliances: 1 to 8 weeks depending on availability
Order materials early. If your top choice is delayed or discontinued, having time to choose an alternative keeps your project moving.
Plan for Disruption
Living through a renovation is tough. Dust spreads quickly, noise starts early, and some rooms may be unusable for weeks. Planning ahead makes a huge difference.
For major renovations, consider moving out temporarily or setting up temporary workarounds. A spare room can serve as a mini kitchen. Cover furniture and belongings with plastic. Create a “clean zone” where workers don’t go.
For projects that involve a lot of debris or air movement, running an air purifier helps keep dust under control.

4: Find the Right Contractor
Your contractor makes or breaks your renovation. A good one keeps the project on track, communicates clearly, and solves problems early. A bad one costs you money, time, and peace of mind. Choosing carefully is the most important step in your entire renovation.
How to Find Candidates
Start by asking people you trust. Friends, family, and neighbors can give honest feedback about their experiences. Local lumberyards and plumbing suppliers are also great resources. They see contractors’ work daily and know who does quality work.
Online reviews help but don’t tell the whole story. A contractor with perfect reviews who never returns calls isn’t the right fit.
What to Look For
Licensing and insurance. In Ohio, contractors should carry liability insurance and workers’ compensation. If they can’t provide proof, move on.
Relevant experience. A contractor who builds custom homes might not be the best fit for a bathroom remodel. Look for someone who regularly completes projects similar to yours.
Communication style. Notice how quickly they respond and how clearly they explain things. You’ll be talking to this person for months, so make sure you work well together.
References you can check. Don’t just collect names. Call them. Ask about budget accuracy, timeline, communication, and whether they’d hire the contractor again. Ask for references from five to ten years ago to see how the work has held up.
Understanding Bids
Get at least three bids for your project, but don’t automatically pick the lowest one. Low bids often leave out labor, materials, or prep work that other contractors include. Some contractors plan to make up the difference with change orders once the project starts.
Compare bids line by line. Make sure each contractor is quoting the same scope of work. If anything seems vague or missing, ask questions until you understand it clearly.
DIY vs. Hiring Pros
Some tasks are fine for handy homeowners:
- Painting walls
- Basic demolition of non load bearing walls
- Installing flooring
- Hanging drywall
- Simple landscaping
Other tasks should always be handled by licensed professionals:
- Electrical work
- Plumbing
- Structural changes
- HVAC installation
- Anything requiring permits
Here’s the reality: more than 30% of the jobs professional remodelers take on come from failed DIY projects. If you’re not confident you can do something safely and correctly, hire a pro.
5: Make All Your Selections Early
This is where many homeowners lose time and money. Waiting until the last minute to choose materials leads to delays, rushed decisions, and costly changes. Locking in your selections early keeps your project moving and removes guesswork for your contractor.
Lock in Decisions Before Construction Starts
Make every major decision before work begins. Have backup options ready. Your top choice of tile or faucet may be discontinued, out of stock, or backordered. If you already have a second option, your contractor keeps moving instead of waiting weeks for materials.
Create one complete list of every selection your project needs. This keeps you organized and prevents last minute decisions. Your list should include:
- Flooring type and color
- Cabinet style and finish
- Countertop material
- Tile for backsplash and bathrooms
- Plumbing fixtures (faucets, showerheads, toilets)
- Lighting fixtures
- Paint colors
- Hardware (knobs, pulls, hinges)
- Appliances
- Door and window trim
Use Design Tools
Free online tools like Planner 5D let you mock up room layouts. Pinterest boards help organize inspiration. Some design build firms include design services that walk you through every selection.
Create a Decisions Binder
Keep all your selections in one place. Include:
- Product names and model numbers
- Vendor contact info
- Order confirmation numbers
- Lead times and delivery dates
- Photos or samples
When your contractor asks what faucet you want, you’ll have the answer ready.
6: Handle Permits and Codes
Most renovation work requires permits. Skipping them may seem easier, but it creates problems with insurance, resale, and safety. Permits exist to ensure your project meets code and is built correctly.
What Needs a Permit
In most areas, you need permits for:
- Structural changes
- Electrical work beyond simple fixture swaps
- Plumbing changes
- HVAC modifications
- Window and door additions
- Roofing replacement
- Deck construction
Cosmetic updates like painting, flooring, and cabinet swaps usually do not require permits.
How the Process Works
Your contractor typically handles permit applications and inspections. If you’re doing the work yourself, you’ll need to:
- Apply at your local building department
- Submit plans showing the proposed work
- Pay permit fees
- Schedule inspections at required stages
- Get final approval when work is complete
Permit approval can take days to weeks depending on your location and the complexity of your project. Factor this into your timeline.
7: Prepare for Construction
Once permits are approved and materials are ordered, it’s time to prepare for construction. Clearing spaces, protecting belongings, and planning for temporary disruptions will make the process far easier to live through.
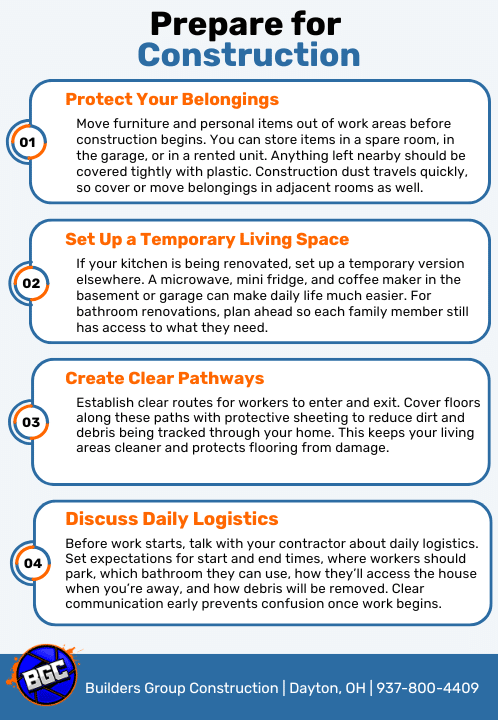
Protect Your Belongings
Move furniture and personal items out of work areas before construction begins. You can store items in a spare room, in the garage, or in a rented unit. Anything left nearby should be covered tightly with plastic. Construction dust travels quickly, so cover or move belongings in adjacent rooms as well.
Set Up a Temporary Living Space
If your kitchen is being renovated, set up a temporary version elsewhere. A microwave, mini fridge, and coffee maker in the basement or garage can make daily life much easier. For bathroom renovations, plan ahead so each family member still has access to what they need.
Create Clear Pathways
Establish clear routes for workers to enter and exit. Cover floors along these paths with protective sheeting to reduce dirt and debris being tracked through your home. This keeps your living areas cleaner and protects flooring from damage.
Discuss Daily Logistics
Before work starts, talk with your contractor about daily logistics. Set expectations for start and end times, where workers should park, which bathroom they can use, how they’ll access the house when you’re away, and how debris will be removed. Clear communication early prevents confusion once work begins.
8: Avoid Common Renovation Mistakes
Even with solid planning, things can go wrong. Knowing the most common renovation mistakes helps you avoid them and keeps your project running smoothly from start to finish.
Changing Your Mind Mid Project
Change orders are one of the biggest reasons budgets spiral. Once construction begins, avoid making new design decisions based on outside opinions.
As one experienced contractor puts it: “The day construction starts, that’s when you leave town so you’re not talking with friends, neighbors, and everyone else who’ll be stopping by with an idea of what you should change.”
If you do need to make a change, understand the full cost. Something as small as moving a light switch can require multiple trades, materials, and extra time. What seems simple rarely is.
Skimping on What You Can’t See
People overspend on countertops and underspend on insulation. They splurge on fancy fixtures but skip proper pipe fittings. This is backwards.
Invest in:
- Quality insulation and air sealing
- Proper electrical and plumbing
- Good windows
- Efficient HVAC equipment
- Solid framing and structural work
These things determine your comfort, energy bills, and maintenance costs for decades. You can always upgrade your countertops later.
Ignoring Ventilation and Comfort
What good is a beautiful bathroom if there’s mold growing behind the walls because you didn’t install proper ventilation?
Make sure your plan addresses:
- Bathroom exhaust fans
- Kitchen ventilation
- Adequate heating and cooling
- Good air quality
- Sound control between rooms
Underestimating Timeline
Renovation timelines almost always take longer than expected. Weather delays, material shortages, inspections, and scheduling conflicts can all extend your project. Add buffer time to every phase. If a contractor estimates eight weeks, plan for ten. Setting realistic expectations reduces stress when surprises come up.
9: Stay on Track During Construction
Once construction begins, your role shifts to monitoring progress and staying organized. Clear communication and consistent check-ins help prevent small issues from turning into bigger problems.
Communicate Regularly
Schedule a weekly walkthrough with your contractor. Review what was completed, what’s coming next, and anything that needs attention. If something looks off, ask about it right away instead of waiting for the final stages.
Check Deliveries
Open every delivery as soon as it arrives. Verify sizes, colors, and quantities. Damaged or incorrect items happen more often than expected, and catching issues early gives you time to reorder before installation.
Track Your Budget
Review your spending weekly. Compare actual costs to your budget and address any overruns immediately. The earlier you identify changes, the easier it is to adjust without derailing the entire project.
Document Everything
Take photos throughout the project, especially before walls are closed. These images help you locate wiring or plumbing later and provide documentation for insurance if you ever need it.
Stay Flexible But Disciplined
Some surprises are unavoidable. Hidden damage, code requirements, and material shortages can force changes. Stay flexible when needed, but avoid adding extra projects “while you’re at it.” Every addition has a cost, so make sure it’s worth it before moving forward.
10: Final Inspection and Walkthrough
Before your contractor wraps up the project, take time for a thorough final inspection. This step ensures everything is finished properly and nothing is overlooked. A careful walkthrough now prevents issues after the crew leaves.
Do a Detailed Walkthrough
Walk through each room with your contractor and look closely at the details. Check for paint touch ups, gaps in trim or caulking, scratches on new surfaces, and any fixtures that don’t function correctly. Make a punch list of everything that needs attention. These items should be completed before final payment.
Verify Permits Are Closed
Confirm that all required inspections have been completed and that every permit is officially closed. Open permits can create problems when refinancing or selling your home, so make sure everything is signed off before the project ends.
Get Documentation
Ask your contractor for:
- Warranties on materials and workmanship
- Manuals for new appliances and systems
- Contact info for subcontractors (in case of future issues)
- Copies of all permits and inspections
- Extra materials (tile, paint, grout) for future repairs
Save Your Selections
Keep a record of every product used in your renovation. Document paint colors, tile brands, grout colors, and fixture model numbers. Having these details saved makes future repairs or updates much easier.
How BGC Helps Dayton Homeowners Plan Renovations
At Builders Group Construction, we know renovation planning can feel overwhelming. That’s why our process is designed to guide you from the first consultation to the final walkthrough.
Our team includes Brittany Gilmore, an Art Institute trained designer with 8+ years of experience helping homeowners turn ideas into plans. Mark Schulte brings deep knowledge of building codes and materials, once driving to Virginia to source the perfect timber for a client’s project. And Justin Vaughn, our U.S. Army veteran project manager, brings military precision to every detail.
We follow a proven 12 step process from first consultation to final walkthrough. You’ll meet your actual installer early on, not just salespeople. Our pricing is transparent, our work is guaranteed, and we’re right here in Ohio.
We serve Dayton, Beavercreek, Centerville, Kettering, Miamisburg, Springboro, and 20+ surrounding communities.
FAQs
What order should I renovate my house?
Start with structural and mechanical work (foundation, roof, HVAC, electrical, plumbing). Then move to walls and insulation, followed by flooring, cabinets, and fixtures. Finish with paint, trim, and accessories. This sequence prevents damage to finished work and ensures inspections happen at the right times.
How much should I budget for a home renovation?
Plan for $15 to $60 per square foot depending on scope and quality. Add 15% to 20% contingency for older homes. A mid range kitchen remodel runs $25,000 to $50,000. A bathroom remodel typically costs $10,000 to $25,000.
Is $100,000 enough to renovate a house?
It depends on the size and scope. For a 1,500 square foot home, $100,000 allows about $65 per square foot after contingency. That’s enough for a solid mid range whole home renovation, or a high end renovation of specific rooms like kitchen and bathrooms.
How long does a whole home renovation take?
Expect 3 to 6 months for most whole home renovations. Larger projects or custom work can take 6 to 12 months. Add extra time for permit approvals and material lead times.
Should I live in my house during renovation?
For small projects like a single bathroom, you can usually stay. For major renovations involving kitchens, multiple rooms, or HVAC work, consider moving out temporarily. Living in a construction zone is stressful, dusty, and can slow down the work.
What renovations add the most value?
Kitchens and bathrooms typically offer the best return. Other high value improvements include adding a bathroom, finishing a basement, and improving energy efficiency with new windows and insulation.
How do I find a good contractor?
Ask for referrals from friends and family. Check licensing and insurance. Get at least three bids and compare them carefully. Call references and ask about their experience. Look for someone who communicates clearly and has relevant experience with your type of project.
What should I do if my renovation goes over budget?
Review your contingency fund first. If that’s not enough, look at your wants list for items to cut or defer. Talk to your contractor about alternatives that cost less. Consider phasing the project and completing some work later.
Ready to Start Planning Your Renovation?
A successful renovation starts with a solid plan. Take time to define your vision, set a realistic budget, and choose the right team. The effort you put in before construction starts pays off in less stress, fewer surprises, and better results.
At Builders Group Construction, we’re here to help you through every step. From initial concept to final walkthrough, our experienced team guides you through the process.Ready to talk about your project? Contact BGC for a free consultation. Call us at 937-800-4409 or fill out our online form. We’ll discuss your goals, answer your questions, and help you understand what’s possible.