Adding a deck to your home is one of the best ways to get more use out of your outdoor space. Composite decking has become the top choice for homeowners who want a beautiful deck without constant maintenance. Unlike wood, composite boards resist rot, fading, and insect damage.
But installation matters. Done wrong, composite decking can warp, buckle, or develop gaps. This guide walks you through every step so you get it right the first time.
At Builders Group Construction, we help homeowners across the Dayton area with deck remodeling and installation from framing through finishing. Whether you are going the DIY route or need professional help, understanding the process helps you make better decisions.
What Is Composite Decking?
Composite decking is made from a mix of recycled wood fibers and plastic. It looks like real wood but requires far less upkeep. You never need to sand, stain, or seal it.
There are two main types. Uncapped composite has no protective outer layer and can absorb moisture over time. Capped composite has a protective shell on all four sides, which makes it more resistant to stains, fading, and mold.
Popular brands include Trex, TimberTech, and Fiberon. Each has its own installation requirements, so always check the manufacturer guide before you start.
Tools and Materials You Will Need
Before you start, gather everything so the job runs smoothly.
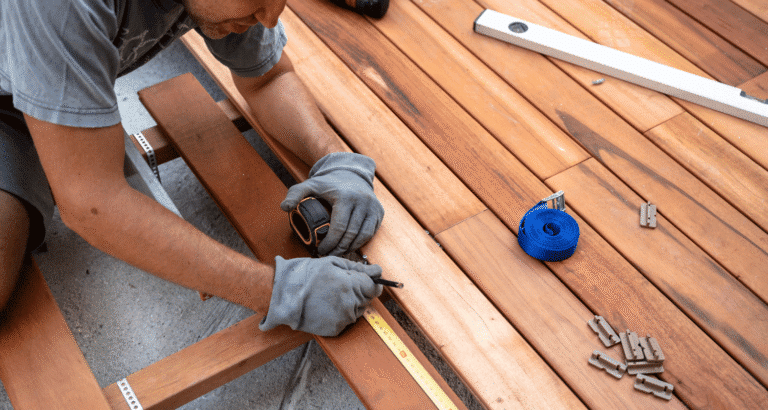
You’ll need a circular saw with a carbide tip blade, a drill, composite deck screws or hidden fastener clips, a tape measure, a chalk line, a framing square, a level, and safety gear including gloves and eye protection.
Using the wrong screws is one of the most common mistakes. Always use screws made specifically for composite decking. Regular screws can mushroom on the surface or cause staining.
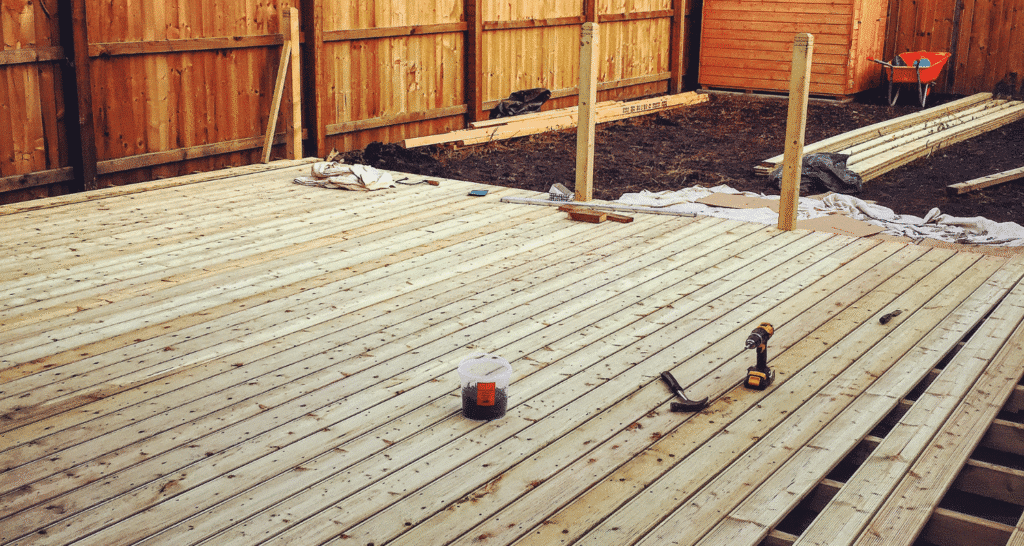
Step 1: Build a Strong Deck Substructure
The frame underneath your deck is just as important as the boards on top. A weak or uneven substructure leads to a wavy, unstable deck no matter how carefully you install the boards.
Joists should be spaced 16 inches on center for standard installations. For diagonal board patterns or stair treads, reduce spacing to 12 inches. Every joist must be at least 1.5 inches wide to properly support the boards.
Make sure the frame is level and square before you move on. Use chalk lines across the joists to find high spots and plane them down. There must be at least four inches of clearance underneath the deck for airflow and drainage.
If you’re working on an older structure, check that all existing joists are still sound before laying new boards on top.
Step 2: Plan Your Layout and Expansion Gaps
Composite boards expand and contract with temperature changes. If you don’t account for this, boards can buckle in summer or pull apart in winter.
Leave a gap between board ends and any fixed surface like a wall or fascia. Most manufacturers recommend at least 1.5 inches from the wall to the first board. End gaps between boards are typically around a quarter inch depending on the brand and climate.
Also decide on your board direction before you start. Running boards parallel to the house is the most common choice. Diagonal patterns look great but require closer joist spacing and more cutting.
Plan where your last board will land. If the final row ends up being a sliver, adjust your starting point so the layout looks balanced.
Step 3: Install Starter Clips and the First Board
The first board sets the line for everything that follows. Get this wrong and every row after it will be off.
Snap a chalk line 1.5 inches from the wall or edge. Pre-drill and attach starter clips at each joist along that line. Push your first board firmly into the starter clips and check that it’s straight before moving on.
If you are starting from an outer edge without a wall, use a board profile that accepts starter clips underneath. This keeps the first board secure without exposed screws on the face.
Step 4: Install Composite Boards Using Hidden Fasteners
Hidden fasteners are the cleanest installation method. They slot into the grooves on the side of each board and screw into the joist below. The next board slides into place over the clips, hiding the fasteners completely.
There are two clip types. Locking clips hold boards in place and prevent movement. Tension clips allow the board to expand and contract naturally. Using the right clip in the right location is critical.
For a single board run with no joints, place locking clips in the center and tension clips on every other joist. For two boards in a row with a butt joint, install locking clips at the joint so boards expand away from it.
Screw clips halfway in first, press the boards tightly together, then finish driving the screws. This keeps spacing consistent across the deck.
Step 5: Handle the Final Board
The last board often needs special attention. If it needs to be narrower than a full board, rip it to width with a circular saw. Use a plunge router to cut small grooves so clips can still be used.
If the final board sits against a wall or fascia and clips cannot slide in from the end, face screw it using color-matched composite screws. Drive screws at 90 degrees to the surface. Never toe-screw composite boards.
Step 6: Cut, Trim, and Add Finishing Touches
Once all boards are down, snap a chalk line along the outer edge and trim any overhang with a circular saw. Use a white chalk line only. Other colors can leave permanent stains on composite boards.
Install fascia boards around the perimeter to cover the frame and give the deck a finished look. Pre-drill fascia holes slightly larger than the screw diameter to allow for expansion. Space screws no more than 12 inches apart and keep them at least 1.5 inches from all edges.
For hollow boards, attach end caps using liquid nail or a plastic adhesive. This protects the cut ends from moisture which can cause swelling and cracking over time.
Seal all cut ends with a water-based sealant as soon as you make each cut. This step is often skipped and leads to problems later.
Common Mistakes to Avoid
Wrong joist spacing is the most common structural mistake. Always check manufacturer specs before framing.
Skipping expansion gaps causes buckling. Every board needs room to move.
Using the wrong screws damages the board surface and looks terrible. Always use composite-specific fasteners.
Over-tightening clips pulls boards out of alignment. Snug is enough.
A frame that isn’t level creates a wavy deck. Take time to flatten joists before laying boards.
If you want more context on what separates good contractors from bad ones on projects like this, the red flags to watch for when hiring a contractor is worth knowing before you bring anyone on site.
Composite Deck Installation Cost Overview
Composite decking costs more upfront than pressure-treated wood but saves money over time through lower maintenance.
Material costs typically range from $20 to $38 per square foot installed, depending on the brand, board profile, and complexity of the project. Trex and TimberTech sit at the higher end. Labor adds to the total if you hire a professional.
DIY installation saves on labor but requires time, the right tools, and confidence with framing and cutting. Mistakes on a DIY build can cost more to fix than hiring someone from the start.
Best Practices for a Long-Lasting Deck
Keep the area under your deck clear so air can circulate. Standing water underneath leads to moisture problems even with capped boards.
Clean your deck once or twice a year with a composite-safe cleaner. Avoid harsh chemicals or pressure washing at close range.
Use only manufacturer-approved fasteners. Third-party clips or screws can void your warranty.
Check your local building codes before you start. The International Residential Code sets minimum standards for deck construction including load requirements, joist sizing, and railing height.
DIY vs Hiring a Professional
Composite deck installation is a manageable DIY project if you are comfortable with basic framing, cutting, and working with power tools. The framing stage requires the most skill. An unlevel or poorly built substructure is hard to fix once boards are down.
If your project involves a second-story deck, complex angles, or a large footprint, hiring a professional is worth it. Builders Group Construction handles deck projects and porch and outdoor structure installations for homeowners who want the job done right without the risk.
For homeowners thinking about expanding outdoor living areas further, planning your outdoor living space covers how decks fit into a larger backyard design. And if you are also considering a pergola to go with your new deck, pergola installation is another option worth looking into.
Frequently Asked Questions
What is the best way to install composite decking?
Hidden fasteners give the cleanest look and best long-term results. They hide all hardware and allow boards to expand and contract naturally.
Can composite decking be installed on an existing wood deck?
You can install composite boards on an existing frame if the joists are structurally sound and properly spaced. Never install composite boards directly on top of old decking.
Do composite boards need spacing?
Yes. Boards need end gaps and side gaps to allow for expansion and contraction. Skipping this causes buckling.
What screws should I use for composite decking?
Always use screws made specifically for composite decking. Regular wood screws can mushroom on the surface and cause damage.
How long does composite deck installation take?
A basic deck can take a weekend for an experienced DIYer. Larger or more complex projects may take several days or longer.
Can I install composite decking myself?
Yes, if you’re comfortable with basic construction. The framing stage is the most technical part. If you’re unsure about the substructure, get professional help for that stage at minimum.
What is a hidden fastening system?
It’s a clip-based system that slots into grooves on the side of each board. Clips screw into the joist below and the next board slides over them, keeping all hardware hidden from view.
Is composite decking waterproof?
Capped composite is highly resistant to moisture but not fully waterproof. Proper ventilation underneath and sealing cut ends prevents water from getting into unprotected areas.
Start Your Deck Project the Right Way
Composite decking is a smart investment that adds real value and usability to your home. But the installation process has to be done correctly to get those benefits.
If you want help with your deck project, Builders Group Construction serves homeowners across Dayton and surrounding areas. Contact us today for a free consultation and let us make sure your deck is built to last.