Many homeowners reach a point where a walk-in shower just doesn’t meet their needs anymore. Maybe you have young kids. Maybe you want a space to relax after a long day. Or maybe you’re thinking about resale value. Whatever the reason, converting a walk-in shower to a tub is a project that is absolutely worth considering.
It is not as simple as swapping one fixture for another. The plumbing layouts are different, the floor support requirements change, and waterproofing has to be done right. Builders Group Construction works with homeowners across Dayton on bathroom remodeling projects including full shower-to-tub conversions. Getting the planning right from the start saves you from expensive problems later.
This guide covers every step of the process so you know exactly what to expect.
Can You Convert a Walk-In Shower to a Tub?
Yes, but it depends on your space and existing plumbing setup.
The biggest factor is the drain location. A shower drain sits in the center of the floor. A tub drain sits 8 to 15 inches from one end. That means the drain line almost always has to move.
The second factor is floor support. A shower base weighs around 150 to 200 pounds when in use. A filled cast iron tub can weigh 500 to 800 pounds. Your floor framing may need reinforcement before a tub can go in.
Most standard alcove showers are 60 by 30 inches, which happens to match a standard alcove tub perfectly. That makes the swap more common than people realize. But every bathroom is different, so a proper assessment before you start is essential.
Types of Shower to Tub Conversion Methods
There are a few different approaches depending on your budget and goals.
A full demolition and rebuild gives you the most control. Everything comes out and the space is rebuilt from scratch. This is the most reliable method and the best choice when plumbing needs to move or the subfloor needs work.
A prefabricated tub insert is faster and cheaper. An acrylic or fiberglass unit drops into the space. This works well when the existing plumbing lines up closely with the tub requirements.
A freestanding tub conversion works in larger spaces. The tub sits away from the walls and exposed plumbing connects to it. This option is more of a design statement and requires floor reinforcement and space around the tub for cleaning and access.
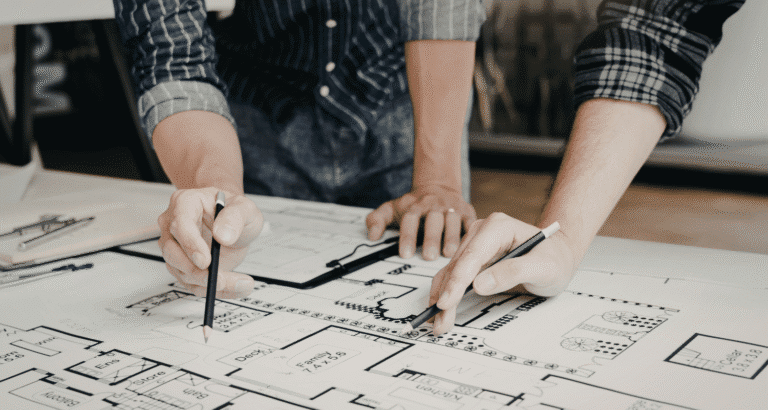
Step 1: Plan Your Bathroom Layout
Start by measuring your shower space carefully. Measure wall to wall at three points since walls are rarely perfectly square. Note the drain position and how far it sits from the back wall.
Decide on your tub style. Alcove tubs are the most practical choice for a direct swap. Deep soaking tubs give a spa feel but require more hot water capacity. Freestanding tubs look great but need more floor space and floor reinforcement.
Standard alcove tubs are 60 inches long and 30 to 32 inches wide. If your shower space is smaller, compact tubs in the 48 to 54 inch range are available.
Order your tub before you start demolition. Custom or specialty tubs can take four to six weeks for delivery and you don’t want your bathroom torn apart while you wait.
Step 2: Check Plumbing Requirements
This is where most homeowners underestimate the project. Plumbing changes are almost always required.
The drain has to move from the center of the floor to 8 to 15 inches from the end wall. This means opening the subfloor and running new drain lines with a slope of a quarter inch per foot for proper flow.
The shower valve gets replaced with a tub and shower valve that includes a diverter. Building code requires a pressure-balancing or thermostatic anti-scald valve on the tub filler. This isn’t optional.
If you plan to add a freestanding tub filler, the supply lines need to be set to the correct height and location while the floor or wall is still open.
A licensed plumber should handle all drain and supply line work. Moving plumbing lines almost always requires a permit and inspection. Skipping permits can void your insurance and create problems when you sell the home.
Step 3: Evaluate Structural Requirements
A filled bathtub puts far more weight on your floor than a shower ever did. Before you install anything, the floor framing needs to be assessed.
In most cases, joists need to be sistered or blocked to handle the added load. This is especially important for cast iron or stone resin tubs. If you are on a wood subfloor, this work is straightforward. If your home is built on a concrete slab, drain relocation and any structural work becomes more complex and more expensive.
Inspect the subfloor for rot or soft spots while the shower is being removed. Hidden water damage is one of the most common surprises found during bathroom conversions. Address it before the tub goes in.
Step 4: Remove the Existing Walk-In Shower
Start by shutting off the water supply lines. Then remove the showerhead, handles, valves, and any exposed plumbing. Cap the supply lines once fixtures are off.
Unscrew the shower drain and plug the hole to prevent debris from falling through. Break up the shower base mortar bed carefully and remove remaining pieces without damaging the subfloor underneath.
Strip the wall panels or tiles from the surrounding walls. Be careful not to damage the wall framing you plan to keep. Once the space is completely clear, you have a blank starting point for the new tub installation.
If you find mold, rotted framing, or failed waterproofing behind the walls, stop and address it before moving forward. Covering up existing water damage is one of the most costly mistakes in any bathroom renovation.
Step 5: Install the Bathtub Frame and Plumbing
Position the tub in the exact location and use shims to level it perfectly. Mark the plumbing locations that need cutouts in the tub skirt.
Connect the drain piping with the correct glue and fittings. Confirm the slope is a quarter inch per foot before securing anything. Test for leaks before closing up the floor.
Install the tub overflow system which prevents water from spilling onto the floor if the tub fills too high. Connect hot and cold supply lines and install the tub valve according to manufacturer specs.
If you are adding jetted or heated features, wire and plumb those now while the walls and floor are still open. Doing it after the walls are closed costs significantly more.
Step 6: Waterproofing and Wall Preparation
Waterproofing is not a step to cut corners on. Failed waterproofing behind tile is one of the most common causes of mold, rot, and structural damage in bathrooms.
Install cement board over the tub flange and surrounding wall areas. Apply a waterproof membrane such as RedGard and seal every corner, seam, and plumbing penetration. Don’t use regular drywall anywhere near the wet zone.
Check that the window area, if there is one in the shower space, has proper flashing and moisture-rated materials. A window in the wet zone needs waterproofing wrapped fully into the opening with a sloped sill.
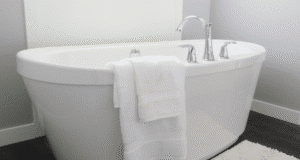
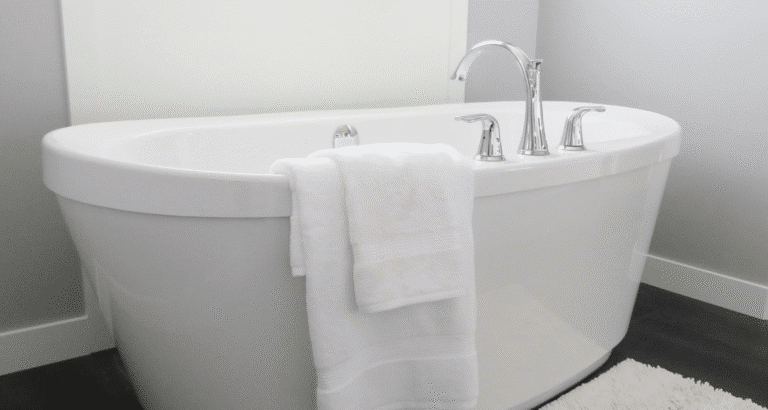
Step 7: Install the Bathtub and Surround
With waterproofing complete and cured, set the tub into its final position. Secure the edges according to manufacturer instructions.
For an alcove tub, install the wall surround next. Acrylic panels are faster to install and easier to clean since they have no grout lines. Tile surrounds take longer and require grouting but offer more design options and a higher-end finish. Follow all adhesive and grouting guidelines and allow full curing time before exposing the area to water.
Seal all joints where the tub meets the wall with silicone caulk. This joint is critical. It’s the most common place for water to work its way behind the wall.
Step 8: Finishing Work
Install the faucet, tub spout, and showerhead if you are keeping shower functionality. Confirm the anti-scald valve is working correctly before the first use.
Grout the tile surround if applicable and seal it once cured. Apply a final waterproof check across all joints, seams, and connections.
Install any glass doors, curtain rods, shelving, or storage niches. These finishing touches complete the look and add day-to-day functionality.
For homeowners thinking about how the new tub fits into a broader bathroom refresh, the bathroom remodeling mistakes to avoid is worth reviewing before you finalize any decisions. And if you want to think beyond the tub itself, luxury bathroom remodeling tips covers upgrades that make a real difference in how a bathroom feels.
DIY vs Hiring a Professional
Simple conversions with minimal plumbing changes are manageable for experienced DIYers. But most shower-to-tub conversions involve drain relocation, structural work, and waterproofing, which are areas where mistakes lead to serious and expensive problems.
Water damage from a poorly sealed tub can cost $1,500 to $5,000 to repair. A sagging floor from inadequate joist support costs even more. These risks make professional installation the smarter choice for most homeowners.
If you are unsure whether your project is a simple swap or a complex conversion, the DIY vs professional remodeling breakdown helps you assess where professional help is worth it.
Common Problems During Shower to Tub Conversion
Drain misalignment is the most frequent issue. The drain has to be in the right position for the tub to work properly.
Weak floor support causes flex and cracking over time. Always check joist capacity before setting a heavy tub.
Incorrect waterproofing behind tile leads to mold and rot that doesn’t show up until significant damage has already occurred.
Ordering the wrong tub size causes delays and returns. Always measure before ordering.
Skipping the permit creates insurance and resale problems down the line.
How Long Does the Conversion Take?
A basic insert swap with no plumbing changes can be done in one to two days. A full conversion with drain relocation, waterproofing, and tile work takes five to ten business days. Projects involving slab work, hidden water damage, or structural repairs can run one to two weeks.
Custom or specialty tubs add lead time before the project even starts since some models take four to six weeks for delivery.
Frequently Asked Questions
How much does it cost to convert a walk-in shower to a tub?
Most conversions run $3,000 to $10,500 depending on the tub type, drain relocation complexity, and whether the home is on a slab or wood subfloor.
Can you put a bathtub where a shower was?
Yes in most cases. A standard 60 by 30 inch shower footprint matches a standard alcove tub. Drain relocation and floor reinforcement are usually required.
Do I need a plumber for a shower to tub conversion?
Yes for any drain or supply line work. A licensed plumber should handle all plumbing changes. This work also requires a permit in most areas.
Is it better to convert or replace the shower?
It depends on your goals. Converting gives you a tub where you currently only have a shower. Replacing updates the existing shower without changing the fixture type.
How long does the conversion take?
Simple insert swaps take one to two days. Full conversions with plumbing and tile work take five to ten business days.
Can all bathrooms support a bathtub?
Not without assessment. Heavy tubs require adequate floor joist support. Some floors need reinforcement before installation.
Do I need a permit for a bathroom conversion?
Almost always yes. Any drain relocation or structural change requires a permit and inspection. Skipping permits can void insurance and create resale issues.
What is the easiest way to convert a shower to a tub?
A prefabricated acrylic tub insert with minimal plumbing changes is the simplest method. It works best when the existing drain position is close to where the tub drain needs to be.
What is the best bathtub material for heat retention?
Cast iron holds heat the longest but is very heavy. Acrylic holds heat well when insulated and is much lighter. Enameled steel is the most affordable but loses heat quickly.
Will converting my shower to a tub affect resale value?
Adding a tub to a home that only has showers can increase appeal for families and buyers. Removing the only shower in a home can hurt marketability. Keep at least one shower and one tub across the home for the best resale position.
Start Your Bathroom Conversion the Right Way
Converting a walk-in shower to a tub adds real comfort and value to your home when it’s done correctly. The key is getting the plumbing, structural support, and waterproofing right from the start.
Builders Group Construction serves homeowners throughout Dayton and the surrounding area. If you’re planning a bathroom conversion, contact us today for a consultation and get an accurate assessment of your project before any work begins.